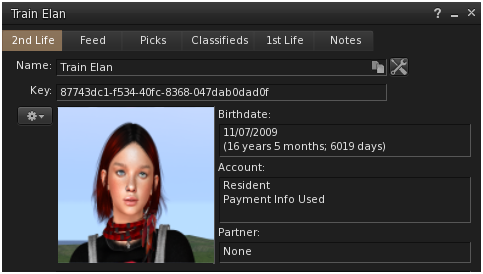
The Origins of Second Life and OpenSimulator

This post is written by AI from my own curiosity. It started with questions like, which came first, SL or OSGrid? Why do they both look and “work” the same? Why are regions restricted in size in SL? Where are the servers? What the hell is a sim, region, grid, anyways? … Eventually , I had it summarize the lesson for me, and I will share it here.

Linden Lab was founded by Philip Rosedale in 1999. The company’s first product was not a virtual world but immersive VR hardware, literally a 360-degree rig known internally as “The Rig,” built as a steel frame with monitors worn on the shoulders. The hardware was impractical and patent-encumbered, so Linden Lab pivoted to software. The staff needed a virtual environment to run on the gear, and that environment, begun around 2001, became the prototype LindenWorld.

LindenWorld was renamed Second Life in 2002 and launched publicly on June 23, 2003. Rosedale supplied the founding vision, a continuous landscape distributed across many servers. Much of the engineering came from Cory Ondrejka, credited as a co-creator, who built key parts of the technical backbone including LSL (Linden Scripting Language), still in use today. Ondrejka became CTO and left the company in late 2007.

The core unit of Second Life is the region: a 256×256-meter square of land. Each region is handled by a single server process called a simulator, or “sim,” written in C++. Historically the rule was one full region per CPU core. The simulator is responsible for nearly everything happening in that square: rigid-body physics (gravity, elasticity, collision detection), a simplified atmospheric model for winds and clouds, all the prims, all running scripts, and the caching and delivery of object and texture data to connected viewers.

A simulator targets 45 frames per second. When it can’t keep up with the load, it does not drop the frame rate; instead it applies time dilation, effectively slowing in-world time so the physics stay consistent. This is why a laggy region feels like everything is moving through molasses rather than skipping frames.

Regions are stitched into a larger world by network links. Each simulator maintains UDP connections, called circuits, to its adjacent neighbors, up to four at the edges, forming a 2D grid of machines. As a viewer walks across a region boundary, control is handed off from one simulator to the next. A separate login service authenticates the user, determines the starting region, tells that simulator to expect the connection, and points the viewer at the correct machine. Central databases handle inventory, assets, and user accounts.

An important division of labor: the simulator only sends updates to a viewer when something changes, a collision, a change in velocity or direction, rather than streaming constant state. This keeps bandwidth down and is one of the ways the system scaled to thousands of simultaneous regions.

When Second Life launched in 2003, cloud computing as we know it did not exist; Amazon Web Services did not launch until 2006. Linden Lab therefore ran everything on its own hardware in colocation facilities. In the late 2000s the workhorse was the “Class 4” server: a Debian Linux box with two dual-core CPUs running four sims per machine (one region per core). Earlier “Class 2” and “Class 3” hardware ran one and two sims respectively before being retired.

That model has since changed completely. Second Life migrated off Linden Lab’s own data centers and onto Amazon’s AWS cloud. Today each region runs as a simulator inside an AWS EC2 instance within an ECS container, with roughly 26,000 regions in operation. The architecture – one sim per region, handed off over the network, is largely unchanged; only the underlying iron moved from owned racks to rented cloud capacity.

OpenSimulator: The Open-Source Server

OpenSimulator was first made public on January 29, 2007, when Darren Guard released a working C# 3D world server. It is not a copy of Linden Lab’s code, which remains closed. It is a clean-room re implementation: the server was written from scratch to speak the same protocol Second Life viewers already used. Because the code originated independently, there was never a copyright case to answer — the only real friction was a trademark rename of the client library from libsecondlife to libopenmetaverse.

OpenSim is written in C# and runs on the .NET runtime on Windows or on Mono on Linux and other Unix-like systems. It is released under the permissive BSD license. It runs in two main configurations:

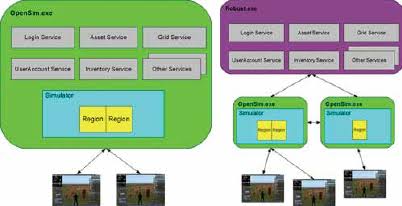
Standalone mode puts the region simulator and all supporting services in a single process (OpenSim.exe) and can use a lightweight SQLite database. This is the simplest way to run one or a few regions.

Grid mode splits the work. Region simulators (each an OpenSim.exe) connect to a central services shell called ROBUST (Robust.exe) — the name stands for “Basic Universal Server Technology.” ROBUST hosts the shared services: assets, inventory, grid, and user accounts. These services are stateless and arranged in a hub-and-spoke pattern, so multiple simulators on multiple machines all draw from the same account and asset pool. In grid mode ROBUST requires a full database such as MySQL rather than SQLite. The traditional login port for a grid is 8002.
Physics is handled by a pluggable engine. The current default is BulletSim (built on the Bullet physics library); the alternatives are ubODE and the older ODE, both descended from the Open Dynamics Engine. Scripts run in a script engine — XEngine or the newer YEngine — and OpenSim supports both LSL and an extended dialect, OSSL, plus C#. As a rough capacity guide from the project’s own documentation, each active avatar consumes on the order of several percent of a CPU core, and a busy region with roughly 15,000 prims and 2,000 scripts can want about 1 GB of RAM.

OpenSim also adds features Second Life never had. Varregions allow a single region to exceed the fixed 256-meter square – 1024×1024 and larger are common. And Hypergrid lets an avatar teleport between entirely separate grids, run by different people on different hardware, via a hyperlinked map of public grids, something impossible inside Second Life’s single closed world.

Why the Two Work Together: The Viewer

Second Life and OpenSim look identical because they are viewed through the same client. In 2007 Linden Lab open-sourced its viewer, which enabled third-party viewers such as Firestorm and Singularity. Since OpenSim was written to answer the same protocol those viewers speak, one viewer can connect to Second Life or to any OpenSim grid and render the same water, terrain, prims, avatars, and build tools. The visual layer — rendering and UI — lives entirely in the viewer; the server’s job is to hold the world state and speak the protocol. That clean split between client and server is exactly what allowed an independent, open-source server to slot in behind an existing client and reproduce the whole experience on hardware anyone can own.

Self Hosting on Everyday Hardware
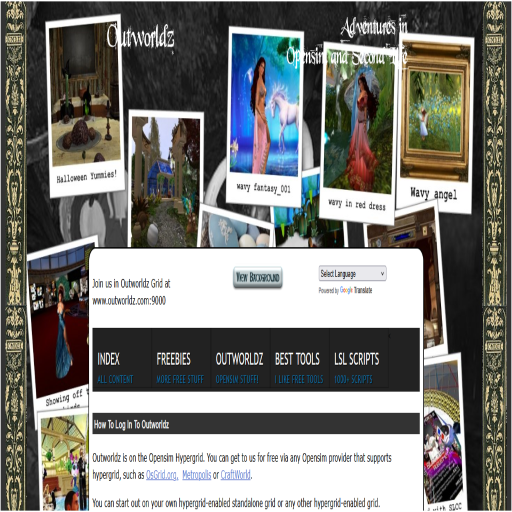
The practical consequence of OpenSim’s design is that a grid no longer needs a data center. Packages such as DreamGrid (from Outworldz) bundle OpenSim, its database, and a management interface into a Windows installer that automates the configuration work, the ROBUST services, region setup, backups, and hypergrid addressing that would otherwise mean hand editing .ini files. The same one sim per region architecture that once required Class 4 servers in a colo now runs comfortably on a single desktop PC or Laptop, with the owner’s home internet connection and a few forwarded ports standing in for Linden Lab’s network fabric.

Written by Claude AI from technical details drawn from the OpenSimulator project documentation, the Second Life Wiki server-architecture pages, and Linden Lab’s published history.

You Knew There Had to be a Keyboard Shortcuts Post

I can’t have a helpful hints blog, without offering a cheat sheet for keyboard shortcuts, now can I?

Trying to remember that shortcut.

17 years inworld, you’d think I know all the shortcuts, but I don’t, I learn new ones all the time. The other day, I found Ctrl+Alt+C brings up some nifty camera prefs that I’d never really explored before. I know they are buried in the top menu, but using the shortcut helped me smooth out my camera settings, and made me say out loud… “Hey, my next blog post!”

These will work with Firestorm viewer and the official SL viewer. There are many more, this is a short list for everyday use, nothing specialized. A photographer, or a builder, would have their own set of shortcuts, as you can imagine. Camera Controls and Second Inventory are Firestorm only and marked.

UI & DISPLAY

Hide UI — Ctrl+Alt+F1
Show/Hide Transparent Objects — Ctrl+Alt+T

CAMERA & ZOOM

Zoom In — Ctrl+0
Zoom Out — Ctrl+8
Zoom Default — Ctrl+9
Camera Controls — Ctrl+Shift+C (FS only)
Reset Camera — Esc
Mouselook — M
Orbit Camera Clockwise — Alt+A
Orbit Camera Counter-Clockwise — Alt+D

NAVIGATION & MOVEMENT

Move Forward/Back — W / S (or arrow keys)
Fly Toggle — F (or Home key)
Always Run — Ctrl+R
Jump / Fly Up — E or PgUp
Crouch / Fly Down — C or PgDn
Teleport Home — Ctrl+Shift+H
Sit Down — Alt+Shift+S
World Map — Ctrl+M
Mini-Map — Ctrl+Shift+M

BUILDING & EDITING

Open Build Tool — Ctrl+B
Upload Image — Ctrl+U
Focus on Selection — H
Zoom to Selection — Shift+H
Link Objects — Ctrl+L
Unlink Objects — Ctrl+Shift+L
Duplicate Object — Ctrl+D
Undo — Ctrl+Z

COMMUNICATION & SOCIAL

Conversations / IMs — Ctrl+T
Nearby Chat — Ctrl+H
Friends List — Ctrl+Shift+F
Groups — Ctrl+Shift+G
Gestures — Ctrl+G
Nearby People — Ctrl+Shift+A
Shout (in chat bar) — Ctrl+Enter
Whisper (in chat bar) — Shift+Enter

INVENTORY & PANELS

Inventory — Ctrl+I
Second Inventory (FS only) — Ctrl+Shift+I
Preferences — Ctrl+P

Maps! The Undiscovered Country

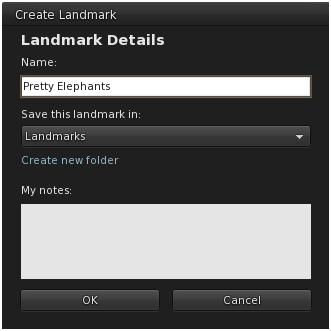
The Map and Create Landmark Tabs are a dynamic duo together. They show you where you are and make it real easy to get back again, all in a couple of clicks. When you create a Landmark you can call it something you will remember, hit save and it’s added to your Places, and the best part is, you will return to that exact spot, bypassing the public landing point. You can add it to a folder in your places at the same time as well, keeping the inventory tidy.

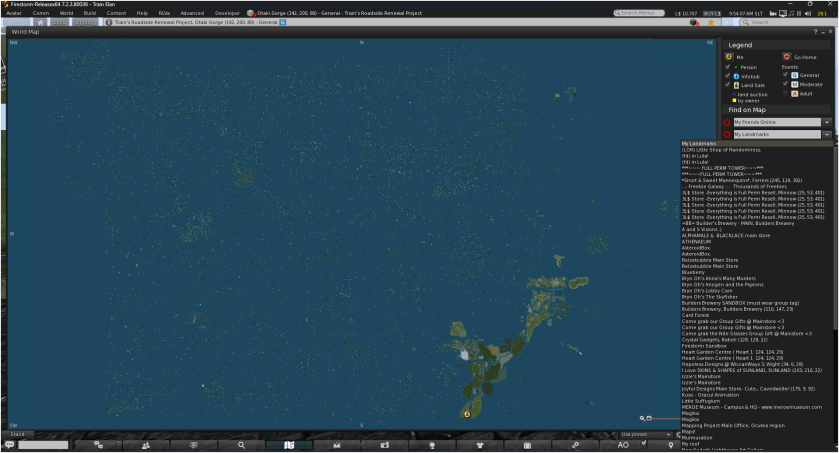
If you don’t already, start opening your Map screen every SLday. No really. And not the wee little default window, let’s go full screen and pull that focus out, all the way out my friends, and open it up big every time you are somewhere new, and marvel at how small you are in this world we created. The SL world map is a visual metaphor for Second Life, a collection of individual efforts that make a whole. It opens and you can’t help but feel a little awestruck each time, and it’s only when you start zooming in that you see the parts, and you keep zooming until you see the part that is you.

You see the mainland right away in the bottom right, and then the expanse of Linden Lab’s explorations out into the Grid, our small islands of pixelated humanity reaching ever outward one U at a time. Open your landmarks and see where those places exist on the grid. If you’re feeling really adventurous, look up a name and explore why it’s called that, and why you feel a bump in the road when crossing sims.

This is where you live when you’re plugged in my friends. If the teleporters broke down tomorrow and you were on the mainland, could you find your way home hmmmmm? Know your number, and know your surroundings and Second Life won’t be so second after all.

The Windows Firewall Blues

The Windows firewall blues can linger like a cloud, darkening your Second Life without you even knowing it. Are you having teleportation issues? Feeling logged out when you should be snappy? Your Windows machine that runs your viewer could be causing problems by constantly scanning your .exe files, and all your viewer’s contents folders as well. Lets take a mental health break, put the phone on dnd, and let your Second Life viewer breath without constantly asking permission from Windows.

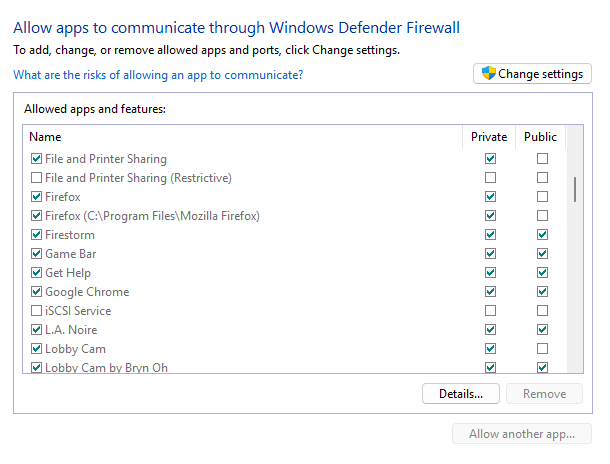
First, lets make sure that your viewer is being allowed through Windows Firewall. This should have happened when you first installing the viewer, but lets check.

Open Firewall Settings.
Windows 10: Open Windows Security -> Firewall & Network Protection -> Allow an app through firewall
Windows 11: Press Win + I -> Privacy & Security -> Windows Security -> Firewall & Network Protection

Scroll the list to find your viewer. If it’s not listed, click Allow another app and browse to your viewer’s .exe file and check both boxes, private and public. Click OK to save.

Now that we know the firewall isn’t interfering, lets whitelist your viewer. Why Whitelist Your Viewer?
“Because some anti-virus programs will incorrectly flag a viewer or its components as a virus or threat, removing parts completely and rendering all or part of the viewer slow or non-functional. One known issue is that antivirus can scan every texture placed in cache, slowing down performance significantly, keeping objects from rezzing, and keeping CPU usage high.” Yes, A.I. wrote that, and it sounds important, so lets add all our viewer cache folders and all the .exe files to the Windows list of exclusions.

-> Click the Start button.
-> Type Windows Security and open it.
-> Click Virus & Threat Protection.
-> Scroll down and click Virus & Threat Protection Settings.
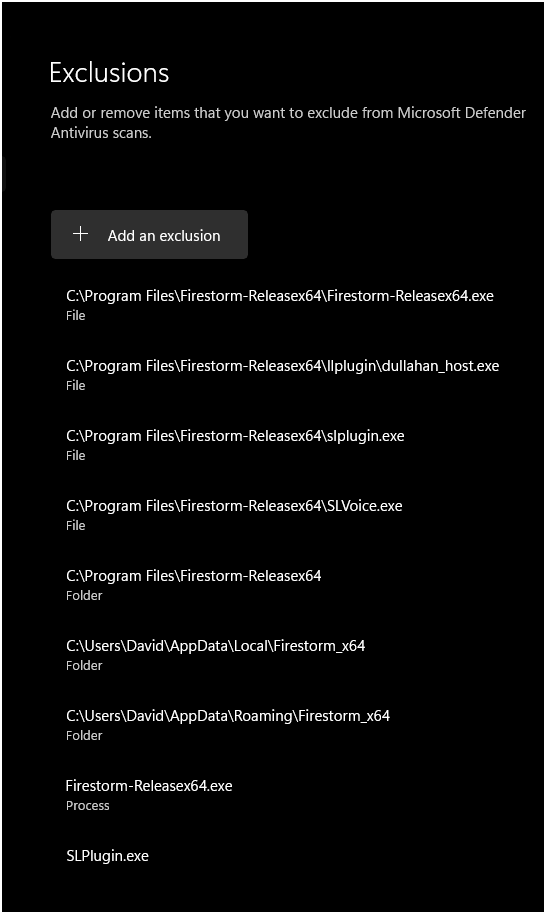
-> Scroll to Exclusions and click Add or remove exclusions. Choose the type, either File (for individual .exe files) or Folder (for the cache folder). Repeat for each .exe file and cache folder.

The files you need to add are:
firestorm.exe (your viewer.exe)
slplugin.exe
slvoice.exe
dullahan_host.exe

And the cache folders:
Windows 64-bit: C:\Users[USERNAME]\AppData\Local\Firestorm_x64 (your viewer_x64)
Windows 64-bit: C:\Users[USERNAME]\AppData\Roaming\Firestorm_x64 (your viewer_x64)

Ok, done! Re boot your machine and now Windows won’t be side eyeing your viewer and frisking it’s pockets with each Sim crossing and Teleport. I hope this mental health break keeps your Second Life sunny, free of the firewall blues.

Size Does Matter!

How long it is matters, and so does its height, yes we are talking about photo uploads to Second Life in this, my first blog post.

Squishy head, stretch head, or just plain wrong looking, have you ever spent some time getting that perfect shot, only to have it look not so good in your profile? SL can be very specific about how it displays images, which means you need to make sure your upload is the correct aspect ratio, regardless of which viewer you use. Forget JPG’s too, only use PNG or TGA for best quality.

Your Profile Page.
Here are the desired photo sizes for uploads into your profile page.

2nd Life tab-> square, best upload size 512×512, OR
4:3 ratio, best upload size 1024×768
1st Life tab-> square, best upload size 512×512
Picks tab-> 16:9 ratio, best upload size 1024×576
Classifieds-> 3:2 ratio, best upload size 512×341

Notice that only the 2nd life space offers 2 options for uploads, square or landscape. Also, the actual px size doesn’t have to be exactly as listed, anything close enough to maintain that aspect ratio will work.

Textures for Building/Prims.

Must be “powers of 2” – 64, 128, 256, 512, 1024, 2048.
SL will auto-resize to the nearest power of 2 which can distort the image.

KEY TIPS for uploading photos to Second Life.

Max standard size: 1024×1024
Max high resolution: 2048×2048
Basic/Plus members: L$10 standard, L$50 high resolution.
Premium members: L$10 standard, L$40 high resolution.
Premium Plus: Free for everything.

I wish someone had told me these things when I was a young(er) avatar, so I hope that the posts in this blog bring you small nuggets of wisdom, or aha moments, to help you navigate this second life without a squished head in your profile pic. So re-size those images before uploading them, cuz size does matter my friends.